
When we think of spring season, vibrant, colourful and cheery things come to mind. Spring implies colourful flowers, rainbows, cute insects, beautiful butterflies and sunny days. This season is full of fun and has the perfect weather. Kids too love this season as they can play outside for long hours. So, it’s no surprise that most kids like to create craft objects inspired from spring.
All kids, whether preschoolers, toddlers or older kids, love making spring-themed craft items from flowers and bugs to trees and scenery. Artwork, whether it is handmade or not, can be good decorative items for the house, classroom or can be a great idea for gifting too.
Interesting Spring-Themed Craft Ideas for Children
The best way to teach children about spring and things related to spring season is through spring-related craft-work. There are so many interesting and easy craft ideas for kids of any age. The variety of craft items is wide too, namely colourful flowers, butterflies, frogs, beetles, etc. Let’s look at some craft ideas for toddlers.
Spring Crafts for Toddlers
Toddlers need craft items that are easy to make and also enjoyable. They can’t cut or draw, so the craft has to revolve around colouring and an adult must be present to guide them through. Here are some spring-themed craft items you can teach your toddler:
Please note: All the images below are for representation purposes only. Some crafts may require the use of a pair of scissors or paper cutter. Adult intervention is strongly recommended to prevent injuries.
1. Paper Plate Flower Bed
Your toddler is going to love this paper plate flower bed. This simple spring craft is easy to make and made by just a few materials.
Supplies:-
- Paper Plate – 2, large-sized
- Paper sheet – Yellow (1 nos) and White (2 nos)
- Acrylic Paint- Brown, Yellow, and Red
- Paint Brush – 1
- Buttons – 5 to 6
- Marker – Brown, Black, Green, Blue, Yellow/Orange
- Coloured pencils
- Green craft sticks – 5 to 6
- Paper Scissors (to be used by adults only)
- Glue
- Paper cutter (to be used by adults only)
How to Do:-
- Take a paper plate and ask your child to mark the centre section for soil.
- Give your child brown paint and ask him to paint the area marked for soil.
- Then ask the child to draw roots on the paper plate with a dark brown-coloured marker.
- Take the yellow sheet, and ask the child to draw a circle on it. This is the sun.
- Now, you need to cut the circle.
- Let the child apply glue on the sun and paste it on the corner of the paper plate.
- Then, ask the child to draw some sun rays using the yellow/orange marker.
- On the white sheet, you need to draw a child figure with a watering can and get your child to colour it with the colour pencils.
- Cut the figure and ask the toddler to glue it to the paper plate, next to the patch of soil he coloured previously.
- The child can also make water droplets falling from the water can with the help of a blue marker.
- Pour some red and yellow acrylic paint in the second plate.
- Ask the child to dip his fingers and make fingerprint flowers on the second white sheet.
- When the paint dries, cut the flowers and ask your little one to paste them on the craft stick.
- Next, the child can paste the buttons in the centre of the flowers to make the pistil.
- Ask the child to draw a few leaves with a green marker below the flowers on the paper plate.
- Make sure to guide your kid to stick the flowers on the edge of the soil.
2. Colourful Jellyfish Craft
Kids will love to make this beautiful jellyfish. It will definitely remind them of their visit to the aquarium and how enthralled they were when they saw the colourful fishes and jellyfishes swimming around. This spring-themed craft is perfect for kids who can use a pair of scissors. If you have younger kids, you can cut the paper instead of handing the scissors to your child. It is a no-mess craft idea as it doesn’t require any painting.
Supplies:-
- Paper Cup – Small-sized
- Tissue paper – Multicolour
- Googly eyes – 2 nos
- Curly gift bow (self-adhesive) – 1
- White-coloured string – about 1 metre
- Glue
- Packaging tape
- Paper scissors
How to Do:-
- Start by cutting the tissue papers into squares. If the kid is small, assist him/her in doing so.
- Best to use a few different colours, so the jellyfish looks colourful.
- Take the paper bowl, ask the kid to keep it upside down. Then apply glue to all over the bottom and sides of it.
- Now the kid can paste tissue paper squares all over it. Make sure the entire bowl is covered with tissue paper. Let the glue dry.
- Poke a hole in the centre of the paper cup.
- Then your kid can pass the string from that hole and make a knot in the inside to hold the cup.
- Then, tape the string knot to the inside of the bowl with a piece of tape.
- Take the curly gift bow, ask your kid to remove the adhesive backing and stick it to the inside of the cup. The bow should be hanging from the centre of the bowl.
- Complete the colourful jellyfish by sticking the googly eyes on either side of the paper cup.
- Use the string to hang it anywhere or the kid can hold the string and play with it.
3. Fantastic Ladybug Craft
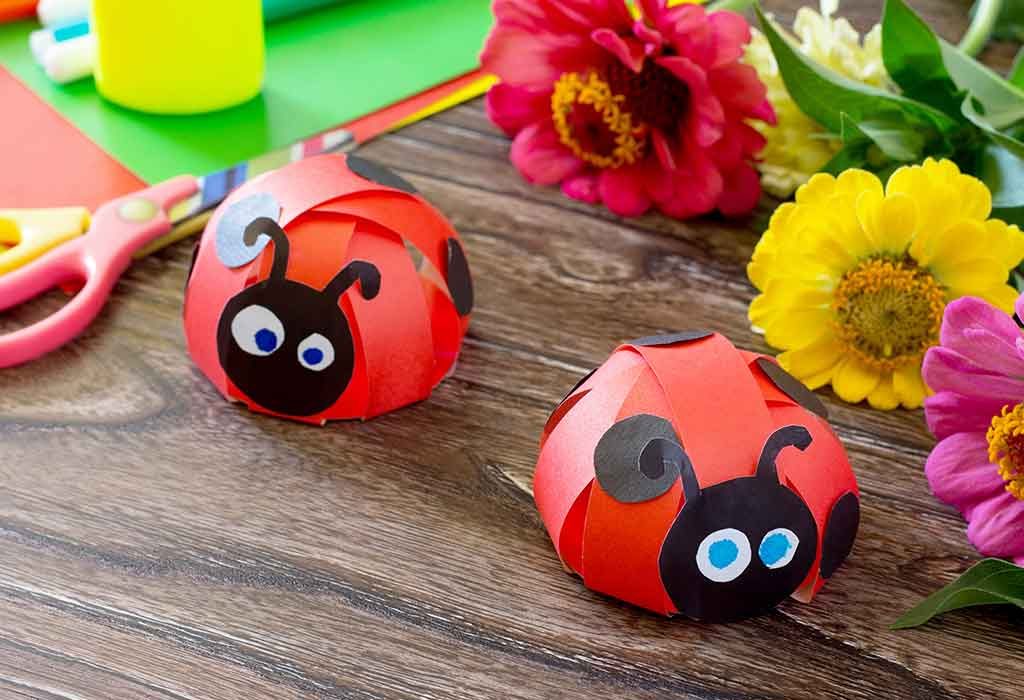
This beautiful ladybug is made from a paper cup, and kids are sure to have a fun time making it.
Supplies:-
- Paper Bowl – Small-sized
- Black cardstock paper
- Red paint
- Paintbrush – 1 nos
- Black pipe cleaner
- Googly eyes
- White crayon or marker
- Black marker
- Paper scissors
- Glue
How to do:-
- The kid should start by painting the paper bowl with the red acrylic paint. Let it dry completely.
- Help the kid to make ladybug head of 2 ½ inches from the black cardstock paper.
- Make many 1 inch circles from black paper for the spots. Cut 6 small strips for legs.
- When the paint on the bowl dries, draw a line in the centre of the bowl with the black marker.
- Now ask the kid to paste the small black circles on the body of the ladybug for the spots.
- Paste the legs at the bottom of the inside of the bowl as legs.
- Poke two holes at one end for the antennae.
- Thread the pipe cleaner from the two holes and bend it to make the antennae.
- Glue the head on top of the holes for the antennae.
- Glue the googly eyes on the ladybug head.
- Draw a smile with the white crayon or marker
Spring Crafts for Preschoolers
Pre-schoolers need crafts which are simple and involve a bit of cutting and other activities. They can cut and draw now but still need a bit of adult guidance and supervision to complete the craft. They are fast to follow instructions and can do most of the things.
Find below some spring craft ideas for preschoolers:
1. Cupcake Crab Craft
Make this fantastic crab with the kids. It’s easy to make and non-messy without any colouring or painting. If the kids are small, adults can assist them with the cutting. Rest the kids will love sticking the sequins to make this sparkly crab.
Supplies:-
- Cupcake liners – red colour (regular or mini size)
- Blue Cardstock paper
- Brown/tan paper lunch bag
- Googly eyes
- White chalk crayon or marker
- Red marker
- Sequins- Gold and Silver
- Paper scissors
- Glue
How to do:-
- The kid should start by cutting the blue cardstock paper in a square shape of about 8-inch x 8 inches. Assist the kid in measuring and cutting.
- Cut a piece of tan or brown paper bag and ask the kid to glue at the bottom of the blue cardstock paper square to make the sand.
- Cut the red cupcake liner in two halves to make two crabs.
- Ask the kid to glue them on the blue paper with the curved edge on the top.
- Now the kid can draw the legs and mouth of the crab with the red marker.
- Take another cupcake liner and ask the kid to make claws from it. Now the kid can glue the claws on the crab.
- Next, ask the kid to paste the googly eyes on the crab.
- To make the crab more decorative paste the gold and silver sequins in the sand to make shiny rocks.
- The kid can also paste some sequins on the blue cardstock paper to give the illusion of rocks at the bottom of the ocean.
- Next, ask the kid to draw ocean waves on the blue paper with the white marker or crayon.
- Your beautiful crab is ready.
2. Duck Finger Puppets
The kids will love this adorable paper duck puppet. They can put it in their fingers and play with it.
Supplies:-
- Cardstock papers – Yellow, orange, brown and green
- Hole puncher-3/4-inch
- Mini cupcake liner – Green and Yellow
- Googly eyes
- Paper scissors
- Glue
How to do:-
- Ask the kid to make two circles on the card stock paper. One of 3 ¼ inches and the other of 2 ½ inches. Use the colour of the kid’s choice. If the kid can’t measure, help the kid to make the circle.
- The bigger circle is for the body and the smaller for the head of the duck.
- Now ask the kid to punch two holes of ¾ inch at the bottom of the large circle.
- These holes are for the fingers.
- Now ask the kid to glue the head of the duck to the body of the duck.
- Make the beak for the duck from another colour cardstock paper and paste it to the head.
- Paste the googly eyes to the head.
- Ask the kid to cut in half the cupcake liner. Again cut in half the already cut liners. These will make the wings of the bird. Glue them to the body of the duck.
- Now the duck puppet is ready to play.
3. Paper Bowl Flower Craft
Kids will love this paper bowl flower craft. It involves colouring and cutting, so adult supervision is required.
Supplies:-
- Paper Bowls – Small size
- Acrylic paint of different colours
- Paintbrush
- Yellow tissue paper
- Stapler
- Green cardstock paper
- Paper Scissors
- Glue
How to do:-
- The kid should make slits on two paper bowls leaving the centre part intact. These slits will work as petals of the flower.
- To get a layered effect for the flower, cut short the edges of the slit to make them smaller.
- Ask the kid to paint the paper bowls in their favourite colour. They can use the same colour for both the bowls or use different colours.
- The kid needs to also paint the outside of the paper bowl.
- Leave the paper bowls to dry.
- When they have dried completely, ask the kid to glue the centre of the bowls together.
- Let the bowls dry.
- When they are dry, ask the kid to paste the yellow tissue paper inside the bowl, on the intact round centre. The adult can help, if the kid is not able to paste it properly.
- The kid can draw dots by a marker on the centre to make the pistil.
- To make the flower stem, ask the kid to fold the cardstock paper and the adult can staple it to shut it.
- The kid can then glue the stem to the base of the flower.
- Next cut out leaves from the green card stock paper and ask the kid to glue them to the stem.
- Bend the petals a little each, to give dimension to the flower.
- Now the beautiful flower is complete.
Spring Crafts for Older Kids
Older kids love to make crafts. They already know how to draw, cut and paint. So making spring crafts is easy and enjoyable to them.
Find below some spring crafts for kindergarten and older kids:
1. Tissue paper flower Bracelet
Make this easy tissue paper bracelet with the kids.
Supplies:-
- Tissue papers – in many colours
- Hole puncher
- Paper scissors
- Pipe cleaner
- Beads- wooden or plastic in many colours
How to do:-
- Ask the kid to make a stack of many tissue papers together. Experiment with different patterns.
- The more number of sheets result in a fuller flower.
- Hold the stack together and cut a small circle in the middle of approximately 2-inch diameter.
- In the centre of the circle, punch two holes with the paper puncher.
- Now ask the kid to take the pipe cleaner, and put one end through one hole in the circle. Make sure both the ends are of equal length.
- Twist the pipe cleaner just right below the circle to hold the circles in place.
- After securing the pipe cleaner, gently spate the tissue paper layers and crumples them gently. Do this with each tissue paper circle.
- Now the kid can thread the beads on the free pipe cleaner ends to complete the bracelet.
- Secure the beads by a knot at the end of twisting the ends. Leave some pipe cleaner empty for tying on the wrist.
- The bracelet is ready to be worn or gifting.
2. Supercuts Fish Craft
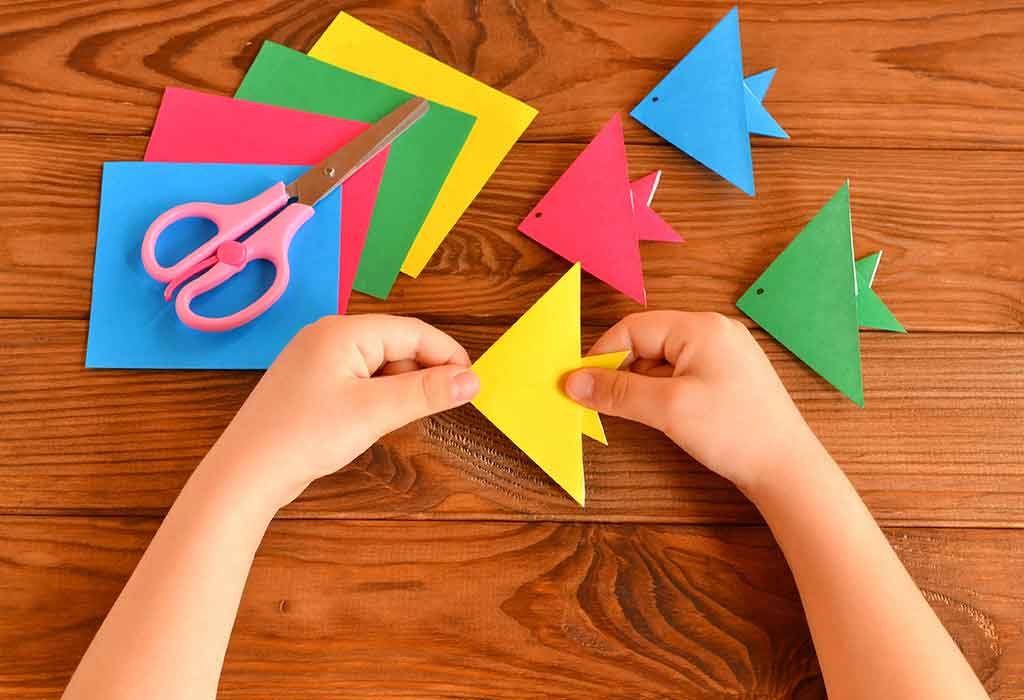
Make this fantastic paper fish with the kids.
Supplies:-
- Colourful card stock paper
- Googly eyes – large
- Marker – Black
- Sequins – multicolour
- Paper scissors
- Glue
- Stapler
How to do:-
- Ask the kid to cut the cardstock paper in two halves. The cut should be lengthwise.
- Now from one piece cut out a triangle piece from both the ends and keep aside the paper scrap.
- Now ask the kid to fold the paper without making a crease in the middle so that both ends touch each other.
- Now cut a triangle out of the folded edge.
- Take out the diamond shape and cut it in two triangles.
- Ask the kid to draw lines with a black marker on these triangles to make them look like fins. The kid should draw lines on the back of the triangles too.
- Now insert the small triangles on the side and staple them to close the rectangle and the triangle to look as fins. Bend them a little to give the two-dimensional look.
- Take the glue and paste the googly eyes on each side of the mouth of the fish.
- Take the large triangle and stick at the back to make back fins.
- Place glue in dot manner throughout the body of the fish. Stick the sequins to these dots to make the fish colourful. Let the glue dry.
- Your paper fish is ready.
3. Paper Sunflower
The kids love making this beautiful sunflower. Easy to make for the older kids.
Supplies:-
- paper- Yellow, Green, Brown
- Tape
- Glue
- Paper scissors
- Black marker
- Small beads (optional)
How to do:-
- Take the sheet of yellow paper.
- Ask the kid to fold in half, from the centre and then cut it with the help of paper scissors.
- Ask the child to fold the half sheet of paper to make an accordion fold.
- When the folding completing, fold the accordion folded paper in half, again.
- Ask the kid to stick the edges with glue to complete the fold.
- Ask the child to repeat the process with the other half of the yellow sheet.
- Now when complete, glue both halves to make a full circle.
- Now draw a small circle on the brown sheet and cut it.
- Ask the child to glue it in the centre of the yellow folded circle.
- Wait for it to dry.
- Cut abroad strip of green sheet and give it to the child.
- Tell the child to roll the green sheet to make the stem for the flower.
- Stick the edges of the green sheet to make the stem firm.
- Make leaves on the green sheet and cut them.
- Make the veins on the leaves with a black marker.
- Paste the stem on the bottom of the flower with the help of glue.
- Stick the leaves on the stem.
- Make sunflower seeds on the brown circle in the centre of the flower with a black marker or paste small beads.
4. Paper Plate Butterfly Craft
Ask the kids to make this simple paper plate butterfly by themselves. It is colourful and easy to make.
Supplies:-
- Floral paper plates
- Pom-Poms
- Pipe cleaner
- Glue
- Woodcraft stick- two
- Pencil
- Googly eyes
- Scissors
How to do:-
- Ask the kid to fold the paper plate in quarters. Then the kid should draw a curved line to make the shape of the wing.
- Cut along the shape of the curved line. Now open the paper plate and cut down the middle to separate the wings.
- Make the diamond shape in the inside edge and cut it.
- Glue together to make the butterfly wings.
- Paste the pom-poms on the wooden stick to make the body of the butterfly.
- Take a bigger pom-pom to make the head of the butterfly.
- Pate two googly eyes on the head.
- Cut the pipe cleaner in two halves to make the antennae.
- Paste the antennas on the back of the head. Bend the antennas.
- Now paste the wooden stick on the wings to attach the body to the wings.
- Attach another wooden stick at the back to act as the holder.
Spring crafts are perfect for kids whether for preschoolers or toddlers. They are easy to make and look beautiful with vibrant colours. Making these crafts or activities also teach the kids to focus their mind and improve their motor skills. Also, these crafts are good options for decoration and kids enjoy seeing their work displayed in the home.


